The concrete floor itself is highly durable, but in the presence of small defects (chips, cracks and crevices) and poorly putty joints of the plates, it can be destroyed, which will entail repairs and significant financial costs, especially when it comes to public buildings.
Cracks in concrete
Additional reinforcement of the concrete base will also be required if cheap materials were used in the construction. Treated floors have several advantages:
- high wear resistance
- resistance to erosion,
- resistance to abrasion and mechanical damage, exposure to chemicals and moisture (including leaks),
- longer operating period.
Putty mixtures carefully and reliably level the floor, providing easier further installation of building and decorative materials.
Putty mixes for concrete
Putty materials are basic and finishing. But there are intermediate universal options that are suitable for all operations, they are much more economical and have low consumption.
Putty for concrete floor
According to the component composition, mixtures of the following types are distinguished:
- cement
- gypsum
- calcareous
- oil
- glue
- varnish,
- polymer or acrylic.
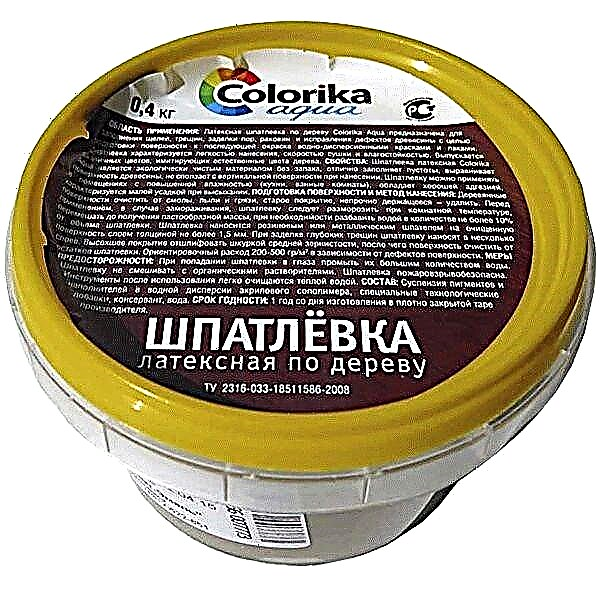
Putty basic STARELI 5 kg
Often manufacturers additionally enrich the putty with polyester or polyurethane additives. Such materials showed minimal shrinkage and high waterproofing properties.
| Putty Name | Average consumption per 1 m2, kg |
|---|---|
| Facade putty | 1,15 - 1,5 |
| Oil-glue | 2,75 |
| Glue | 0,50 |
| Gypsum | 0,80 |
| Finish line | 0,45 |
According to the form of the mixture, there are:
- dry, diluted with water in the indicated proportions,
- pasty - ready-to-use formulations.
Finishing putty Alpina Feinspachtel for processing walls and ceilings from gypsum boards, concrete
Depending on the application method, the putty may be of a liquid or thick consistency. The first type is characteristic of self-leveling compositions used for the treatment of concrete floors. Such mixtures under their own weight without effort are evenly distributed over the entire surface, characterizing the technique of continuous puttying.
Gypsum mixtures
Eco Finish Plaster Finish Putty
Gypsum-based fillers are the least popular option for leveling concrete floors. The advantages of such material can be safely attributed:
- lack of shrinkage
- low cost.
The gypsum composition creates a perfectly smooth surface from the first layer, dries quickly and can be colorized with any color (you can use artistic gouache as a budget option), but it has one significant minus - the material is not suitable for rooms with high humidity.
Why putty on a wooden floor
Putty on wood for interior use is needed not only for the installation of a new floor, but also for the cosmetic restoration of the old coating. This material perfectly eliminates the defects that appear and allows you to perform high-quality preparation for further finishing. The use of putty mixture provides a significant improvement in the aesthetic and technical characteristics of the floor, increases its resistance to external factors and for a long time preserves the beautiful texture of the tree. Even if you decide to update the old floor with a simple painting, experts recommend that you putty it in advance in order to eliminate old cracks, bumps and other flaws.
Today the market offers various putty options that are suitable for wooden flooring, however, you should choose those that satisfy the following requirements:
- They have a uniform texture without impurities.
- Provide high adhesive properties.
- Quickly dry and easily fall on wood.
- Do not crack after drying.
- Amenable to grinding.

It is advisable that the putty does not give much shrinkage, otherwise you will have to apply several layers, which significantly increases the cost of repair work.
Types of putty for wood
For the filling of wooden coatings, modern manufacturers suggest using solvent-based, oil-based, water-based and polymer-based mixtures. It is also possible to choose different shades of putties that are most suitable for certain tree species - birch, wenge, oak, walnut, etc.
Water based putty
Water-based putty is environmentally friendly and absolutely safe in the process, it is easy to use, flexible and practically odorless. Unlike putty on solvents, this material dries slowly in the container, and accordingly has a longer shelf life after unpacking. Due to its good adhesive properties, the mixture can even be used to treat a polished base.

Among the advantages of water putty, the following characteristics are distinguished:
- effective elimination of defects in wood coatings,
- possibility of application for alignment of joints,
- the absence of harmful chemical components in the composition,
- moisture resistance
- durability,
- resistance to temperature influences,
- elastic structure and ability to repeat any surface texture.
Putty on solvents
The solvent-based putty mixture is characterized by high strength, therefore, it has been used for a long time in the woodworking industry. As a disadvantage of the mixture, the content of harmful chemicals and the presence of a pungent odor can be distinguished, therefore, it must be used with extreme caution. The putty has wood dust in its composition, therefore it is excellent for wooden and parquet floors, while it is combined with any kind of wood, including exotic species. Solvent putty is popular in the modern building materials market due to its quick drying and easy application.

Oil mixture
The oil-based putty is characterized by high water-repellent properties and ensures the resistance of the wooden floor to mechanical stress. A wide variety of shades allows you to choose a putty for the exact repetition of the natural texture of wood. The following properties can be distinguished as the advantages of oil putty:
- long term of operation,
- high strength
- affordable price.

The mixture is supplied in jars with a volume of 0.5 to 15 kg, which is very convenient if it is intended to process a wooden floor with a large area. The main disadvantage of the putty is its prolonged solidification, due to which the repair work can be significantly delayed.
Polymer Compounds
Polymer (acrylic, latex) mixture is widely used for puttying of wooden floor coverings and parquet. Such popularity is due to high performance:
- resistance to temperature changes,
- water repellent ability
- resistance to high loads,
- elasticity and effective elimination of the smallest cracks and voids in the wood, as well as joints between the boards,
- lack of shrinkage
- coating durability
- a diverse range of shades,
- quick drying
- safety and environmental friendliness.
The disadvantage of polymer putty is the high cost compared to other materials. But such expenses pay off with a good quality finish, due to which the repair of the coating will not be required for many more years.
Putty Technology
Putty leveling of a wooden floor includes the following activities:
- Foundation preparation. It is necessary to remove all dust and dirt particles from the surface, as well as remove grease stains. Before starting work, make sure that the flooring is completely dry, otherwise the putty will be poorly applied.
- Puttying. Putty is applied on the treated surface with a spatula. The layer should rise slightly above the surface, because during the drying process the mixture will shrink slightly and will have to be putty again.
- Grinding. For this stage, a grinding machine or holder with sandpaper attached to it is used.
- Removing remaining defects. If, after grinding, shells were found, it is necessary to fill them with putty, and after drying, grind again to obtain the most even surface.

Advice! For maximum floor leveling, it is better to apply several layers, a thick layer will harden unevenly and may crack.
Thus, the puttying of wooden floors is not particularly difficult, and anyone who first performs work of this kind will cope with this task. At the final stage of puttying, the surface is treated with a primer, and after 2-3 days you can begin to finish the floor.
Cement mortar
Prospectors putty base cement (20 kg)
Cement based putty mixtures successfully combine an affordable price, consistently high quality coatings and moisture resistant properties. But the material has a number of disadvantages, among which:
- noticeable shrinkage after complete drying,
- the difficulty of leveling the mixture on the surface and the need for certain skills in working with cement compositions.
Special component mixtures make the finished coating resistant to temperature extremes and allow the use of such coatings in rooms with extremely low and high humidity, since strength and durability are maintained throughout the entire life cycle.
Acrylic Blends
One of the most convenient forms - quickly hardens and creates a smooth surface. A multi-component system is not subject to shrinkage and is not afraid of water.
The composition of the polymer putty for concrete floors, in addition to water, includes sand, marble chips, cement, synthetic additives. This putty is plastic, has good waterproofing properties and adhesion to the treated surface, is waterproof, flexible, which makes it an excellent material for preparing the surface for bulk and warm floors. But its use is advisable on surfaces with a small number of deep cracks and grooves.
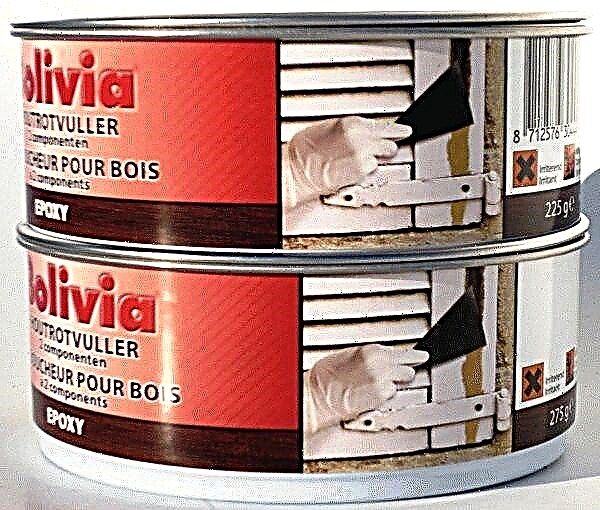
Epoxy mixes for concrete floors
Epoxy putty 250 gr
If it is required to level and strengthen a concrete base with a damaged structure (large cracks, embroidered seams and traces of reinforcement removal), the use of epoxy filler mixtures that tighten the concrete and increase its strength and durability will be most effective.
Epoxy Putty Price
The advantages of such two-component systems, consisting of a base and hardener, are:
- high-quality filling of cracks, crevices, joints,
- elimination of voids formed in the places of replacement of pipes, communications, etc.,
- Strengthening complex areas and tightening structural damage
- the ability to create a durable and wear-resistant continuous coating that does not require further processing,
- high adhesive properties
- the minimum percentage of detachment of the dried layer of putty from the base,
- resistance to moisture, chemicals, as well as germs, mold and fungus.
Epoxy mixture is a finishing material, ideal for smoothing all cavities and unevenness of the floor covering.
Epoxy Putty
Waterproofing putty mixture
The peculiarity of a mixture with increased moisture resistant properties is the possibility of using it as an independent coating, which will be beneficial with a limited budget for repair work. The composition of the putty includes urethane components, a dry base mixture, hardener, target additives and dispersion emulsions.
The waterproofing mass getting Ceresit CR 90 Crystaliser (bag of 25 kg), bag
Most often, waterproofing putty is used during repairs in bathrooms, steam rooms and showers.
The main plus of the material is the lack of the need to wait for the base to dry completely and the ability to work on the wet layer.
Filling criteria
How to choose a putty
It is very important to choose the right building mix, taking into account the properties of the treated surface and the purpose of the room. It is important to pay attention to the following properties of the putty mixture:
- adhesive indicator - there are special solutions for smooth surfaces,
- type of foundation (concrete, aerated concrete),
- moisture resistance, since the putty layer must reliably protect the concrete base from moisture,
- vapor permeability (the ability of a material to remove excess moisture).
| Type of putty | Appointment | pros | Minuses |
|---|---|---|---|
| Cement | For rooms with high humidity and outdoor work | Moisture resistant, cost effective | Significant shrinkage, the possibility of cracking over time |
| Gypsum | For rooms with low humidity | It forms a smooth surface, does not shrink, freezes in 2-3 hours, the maximum layer is 4 mm | Not moisture resistant, the solution thickens in 1.5-2 hours |
| Polymer | For living rooms and rooms with normal humidity | It is easy and convenient in work, quickly hardens. The coating is smooth, glossy. Ideal for topcoat | Expensive |
Important! Pastes and mixtures for concrete substrates are not suitable for aerated concrete and vice versa. Because their composition contains various component additives suitable for a specific structure. When choosing a mixture, you need to remember that its quality will depend on how smoothly and smoothly the finishing materials will fall (parquet, laminate, linoleum or ceramic tile).
Step 1. Preparation of the work surface
The room in which the work will be carried out must be prepared in advance. It is advisable to remove the old flooring, fill deep cracks and crevices with a drill and clean it with a construction vacuum cleaner.
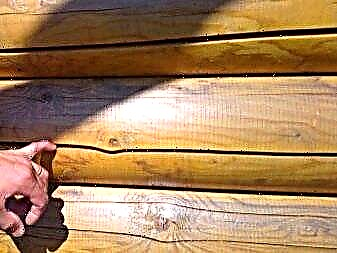
Cracks should be expanded and cleaned.
Then close it with cement mortar (cement: sand: water: bitumen = 1: 3: 1: 0, 5) and wait for the surface to dry completely. Instead of bitumen, you can use PVA glue.
It is very important to remove all stains from the floor:
Usually they are easily washed off with warm soapy water, but if necessary, specialized means can be used.
Step 2. Primer the surface
Before priming, the floor should be cleaned again of debris or sweep. The primer must be selected based on the characteristics of the room, its humidity and purpose.
To apply the composition, you will need the following materials:
- roller or brush
- special pallet.
The primer is applied in two layers, each of which is carefully dried. A high-quality composition seals pores and small cracks, facilitating the implementation of the next stage.
Important! If the base is smooth, then the primer is preferable to take with a quartz filler - it will provide more durable adhesion of the putty to concrete due to the rough surface obtained after priming.
Step 3. Preparation of the solution
Mixing floor repair mix
Putty can be purchased ready-made, or you can mix the composition yourself. To do this, you need a drill with a nozzle or a construction mixer, a suitable container and dry mixes. It is very important to observe the dilution proportions indicated on the packaging.
There is no fundamental difference between the coating obtained from thick and liquid plaster, but there is a difference in applying the composition to the working surface.
Experts advise adding 10-15% more water than the manufacturer recommends. The optimal ratio of dry mix to water is 1: 5, the minimum is 1: 3.
Sometimes you can add sifted chalk, crushed sawdust, and PVA glue to the building mix yourself.
Sawdust must first be soaked for 12-14 hours, and the whole mixture is stirred twice with a mixer. To putty the bathrooms, drying oil is added to the composition - this will make the final coating even more resistant to temperature jumps.
Keep in mind that the solution thickens after 3-4 hours and becomes unusable, losing up to 20-25% of its properties, so you should not do a lot of building mixture right away.
Step 4. Application of the material to the surface
Sealing a large crack
The putty process is quite long and painstaking. From the tools you will need the following:
- spatulas of various lengths,
- Master OK.
For convenience, you can purchase a rubber spatula or tool with convenient handles, be sure to take care of personal protective equipment and gloves. Putty is applied in 2-3 layers, each with a thickness of not more than 4-5 mm. Do not try to eliminate all the irregularities with putty - this process is carried out during the execution of the floor screed.
- Throw small portions of the mixture on the floor or pour some of the composition, then quickly spread everything with a spatula over the surface. Try not to make the first layer too thick - there is a risk that the coating may crack.
- If the processing area is large, you can use a reinforcing mesh with small cells - this will increase the coating strength at least twice. It should be slightly squeezed into the first layer of putty immediately after its application, without waiting for drying.
- After the first layer has hardened (after about 12-16 hours), reapply the freshly prepared mixture.
Putty will dry completely after 24 hours. If there were deep cracks, then the process can drag on for 2-3 days. It is important to dry, eliminating drafts and sudden temperature jumps.
Step 5. Elimination of irregularities
It is more convenient to use a manual machine for grinding
After the final drying, large bumps, protruding lumps of unmixed material should preferably be treated with sandpaper of large grain size Р120-150.
With sufficient skills, puttying can be done independently, without raking in the services of specialists. The concrete floor is quite easy to level, and if all the recommendations are followed, the coating is obtained with high quality and without defects.
No. 1. Putty and putty - is there any difference?
A beginner in the field of construction work may be confused by the fact of the existence of two similar words - “putty” and “putty”. Manufacturers add fuel to the fire and use both concepts. In fact, putty and putty are one and the same, just the origin of the words is a little different.
Word "putty" came to us from the German language, more precisely from the word "spatel", which means a small building spatula, which is used to level the mixture. Another name for the material, "Putty", appeared from the word "putty", which, in turn, means the process of applying the mixture with a spatula. Dictionaries allow the equivalent use of both words, but it so happened that in professional vocabulary they often say “putty”, and in colloquial words they say “putty”.
No. 2. Types of putty as intended
According to the purpose of putty, it is customary to divide it into the following types:
- starting (leveling),
- finishing (decorative),
- universal.
The main difference is the graininess of the material.
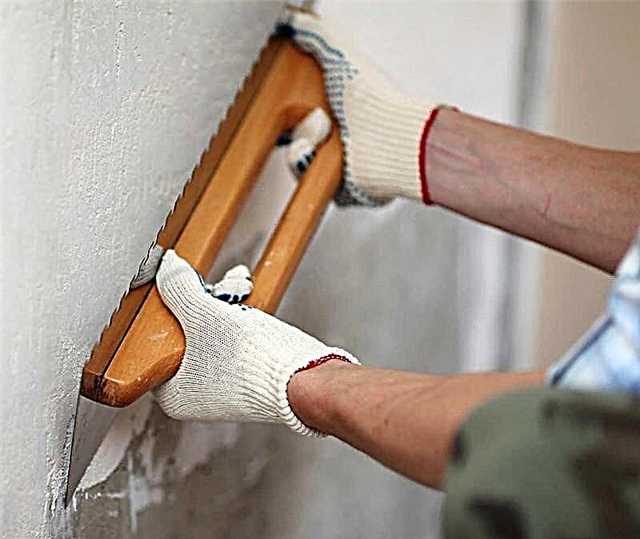
Starting putties have high grit, excellent strength and adhesion. They are intended for leveling walls with visible defects and differences up to 10-15 mm, can be applied layer from 3 mm to 2 cm. Such compositions can be used as a stand-alone leveling agent or use them after plastering. To achieve the best result, it is better to apply the starting putty in a couple of layers. You can work with two spatulas: one slightly more - for applying the mixture to the wall, the second - for taking the mixture from the tank. If the wall surface contains not just defects in the form of pits, but has vertical deviations, then you will have to take a long construction rule.
Finishing putty it is applied over the starting one, it is intended for final wall cladding before decorative finishing (painting, wallpapering). Such compositions are less granular, so they allow you to form a perfectly flat and smooth surface. In terms of strength, the finishing putty is inferior to the starting one, it can be applied 5 mm maximumeasy to process. As in the case with the starting composition, the finish is better to apply in two layers. For subsequent painting, fine-grained putty (100 microns) is selected.
Universal compounds Suitable for both leveling and finishing. It makes sense to use them when the surface is characterized by minimal irregularities and differences. Such putties are more expensive than starting and decorative, but they are inferior in quality to them. If there are serious flaws, it is more advisable to take two separate compositions - you will win by the money and by the result.
Number 3. Types of putty by degree of readiness
There are few options - putty can be sold in two versions:
- dry mix, requiring dilution with water in strictly defined proportions,
- ready putty.
Dry mixes They are most actively sold, as they are inexpensive and have a longer shelf life. These putties are sold in packages weighing from 5 to 25 kg, they are easy to transport and store. In order to obtain the necessary paste-like putty from a dry powder, it is enough to mix the composition with water in a certain amount. It takes a little time to mix and mix, but the putty obtained in this way quickly sets, therefore, it is necessary to work promptly, and kneading the material in large batches will not work. To get a solution with clearly defined and specified by the manufacturer parameters, it is necessary to act strictly according to the instructions. Some attribute to the minuses the need to spend time preparing a solution, but, frankly, this is not a very large time cost. The disadvantage can also be called the presence of dust during kneading.
Ready-made compounds sold in buckets or large tanks. It is easy to guess that they can be used immediately, and this saves time and there is no risk of disrupting the proportions, having received putty of completely the wrong quality. Additional tools and containers are also not needed. The shelf life of the finished composition is less than that of dry putty, but much longer than that of dry putty diluted from powder. Ready-made formulations are more expensive than dry ones.
Number 4. Types of putty by composition
Depending on what materials are included, putties are:
- cement based
- gypsum based
- polymer putties (this includes acrylic, latex and polymer cement compositions).
Less commonly, but used, are oil-glue, glue and oil putty, as well as putty.
Cement putty
Inexpensive and durable cement putties prepared on the basis of cement, sand and water. Cement is usually taken grade M400 or M500, sand - fine, river, with a minimum amount of impurities. Such compositions are sold in the form of dry mixes, but some masters prepare it themselves, mixing 1 part of cement with 3-4 parts of sand and mixing the solution with water before setting. It should not be too thick, and not too thin. To prepare the right solution, you must have solid experience in performing puttying, so it is much easier to take the dry mixture and dilute it with water.
Advantages of cement putties:
- high strength, according to this parameter, the compositions have no analogues. It is possible to destroy a layer of cement putty only by hitting it with a hammer,
- moisture resistance, therefore the composition used in rooms with high humidity (bathroom, kitchen, pool) and for facade work,
- resistance to low temperatures,
- low price.
disadvantages:
- complexity of application. Even an experienced specialist in a working day will be able to putty not more than 7-8 m 2 of the surface,
- low elasticity. It is necessary to grind the composition almost immediately after application, until it is dry,
- shrink ability. Often there is a need to reapply putty,
- cracks may appear on the surface immediately or over time,
- the composition does not adhere well to a smooth surface (for example, monolithic reinforced concrete),
- the composition is not suitable for the treatment of wooden surfaces,
- long drying process.
Gypsum putty
White and plastic gypsum plaster is excellent for preparing walls for painting. It’s easy to get with it. perfectly flat surface. Gypsum can take excess moisture from the air, and then give it back when the air becomes too dry.
Main advantages:
- the ability to create a perfectly smooth surface without roughness, perfect for further painting or other cladding,
- lack of shrinkage
- gypsum putty perfectly aligned,
- the composition dries quickly
- high degree of fire resistance
- gypsum lets air through, is not susceptible to mold, is safe for health,
- improves the thermal insulation of the room,
- low price.
Minuses:
- low resistance to moisture and temperature extremes, so the scope of use of gypsum putties is limited exclusively dry heated rooms
- low strength
- gypsum putty can accelerate metal corrosion.
Polymer putty
As the name of the composition suggests, it is based on polymers. Such putties provide an ideal result, but are expensive. Depending on which polymer was used, the following compounds are isolated:
- acrylic putty - This is a kind of universal composition. It can be used for leveling. brick, concrete walls, wooden floors, cement surfaces, drywall and metal, as well as for finishing work. With this composition, you can get a perfectly smooth, almost mirror-like surface, which is why often this putty is used for the ceiling. You can apply the composition as a thin layer of 1 mm, or thicker. Acrylic putty suitable for indoor and outdoor work (there is a special composition for facades), can be used in wet roomsIt is distinguished by excellent adhesion with various surfaces, it is odorless and forms a strong layer. It is easy to work with, and hands and tools can be washed with plain water. The material is not afraid of moisture and allows you to protect the walls or ceiling from moisture, is easily sanded with sandpaper, does not shrink, but is not cheap. On the shelves of stores there are a large number of fakes and low-quality goods, in which there are impurities. They can leave scratches on the surface,
- latex putty prepared on the basis of acrylate latex, great for creating a finish layer. With its help, you can get a perfectly smooth surface, however, applying a layer of more than 3 mm is undesirable - the material can crack. The composition is great for working with drywallcan also be used for leveling wooden, brick and concrete surfaces. Scope of use is limited. internal work,
- polymer cement putty - This is actually the same cement, but due to the introduction of polymer components, it has become more ductile. Used for leveling concrete and brick surfaces, can be applied with a layer of up to 2 cm.
Other types of putties
Much less often, but still these types of putty are used:
- oil-glue putty consists of water, drying oil, acrylates, plasticizers and other additives. Intended for internal worksuitable for wood and concrete. It has a specific smell, inferior in properties to many other species, so today it is practically not used,
- oil putty based on drying oil, driers and chalk is used in interior work in the preparation of door and window openings, window sills and other wet places. Suitable for leveling with subsequent oil painting,
- shpakril It can be used for plastering plinths and leveling plastered surfaces. Sometimes the composition is used for gluing ceramic tiles in dry rooms. When diluted with water, a whitewash mixture is obtained,
- PVA based putty the composition has a lot of antiseptic additives, so that mold and fungus are not afraid of the material. The composition is suitable for leveling concrete, plaster, plasterboard and asbestos-cement surfaces.
No. 5. What putty to choose?
As is clear from the existing assortment, putty is chosen depending on what material will be leveled, taking into account the peculiarities of the temperature and humidity conditions in the room:
- for walls, you can choose virtually any putty. If it comes to bedrooms, living rooms, nurseries, hallways, offices and other rooms with a normal level of humidity, it is best to take gypsum putty. For work in the bathroom, cement or acrylic putty is suitable,
- for puttying the ceiling usually take an acrylic composition that allows you to create the most even and smooth surface, but gypsum putty is also quite applicable,
- for puttying wooden surfaces it’s better to choose an acrylic composition,
- for plasterboard putty Acrylic composition and plaster, if it comes to dry rooms,
- for front and other external works suitable cement and acrylic facade putty,
- for painting it is better to take gypsum or polymer putty - they create an even beautiful layer. Under the wallpaper, you can use cheaper cement.
No. 6. Do-it-yourself wall putty
Putty can be used to level surfaces with minor irregularities and level differences, otherwise plastering or even installation of drywall sheets will be required. Puttying walls and ceilings is easy to do with your own hands:
- surface preparation, which consists in cleaning from dust, degreasing and mandatory priming. When it comes to rooms with a high level of humidity, you can additionally treat the walls with an antifungal agent,
- if you chose a dry mixture, then you must dilute it with the amount of water indicated on the package and mix until a homogeneous solution is obtained. Prepared putty before use also does not interfere with a little mix.
- starting putty best applied with two spatulas. With the smaller one, they scoop up the composition from the container and apply it to the larger one. It is also convenient for them to remove the remnants of the mixture. The size of the large spatula depends on the degree of surface roughness. If the differences are significant, then it is better to take a rule (maybe up to 1.5 m long) with an integrated level and control the quality of the work performed. If the starting putty is applied in two layers, between them it is better to use a reinforcing reinforcing mesh and a primer layer,
- finishing putty applied after the starting layer has dried, but some masters ignore it if dense wallpaper, decorative plaster, tile and other materials are used as cladding, except for ordinary paint. Some people prefer to wash the finish layer with a primer solution and sand it to completely get rid of all the bumps.
Number 7. Large manufacturers of putty
The putty market today is oversaturated - you can find a mixture of any composition for any type of surface and, most interestingly, at almost any price. We all like to save money, especially when it seems that there is no difference between two similar products.When it comes to putties, saving does not seem like such a reasonable thing, because hardly anyone would want the putty layer to crack and fall off after a few months along with the paint. Trust is better products of large manufacturers:
- Knauf - A large German company, whose factories are today located around the world, including in Russia, which allows us to buy quality products at more affordable prices. Knauf putties are represented by cement, gypsum and polymer compounds, are sold in dry and finished form. There are solutions for all areas of use. The company's special solution is gypsum putty with components that protect against X-rays,
- Ceresit - products of a large concern, which is very popular all over the world. Under the Ceresit brand, cement and polymer putties are sold
- Tikkurila - Another well-known concern, which, among other things, produces putties. The company offers acrylic moisture resistant and gypsum compounds. Also in the assortment there is Euro Filler Light putty, which is distinguished by its ease of application and the absence of the need for grinding - the surface itself becomes flat. The color of the composition can be selected from 15 offered. The company also offers putty on wood Spakkeli, which is suitable for processing doors, furniture and other wooden surfaces indoors,
- Vetonit offers polymer, cement compositions and putties on an organic binder. There is a composition that not only aligns the seams on the drywall, old painted surfaces and wallpapers, but also allows you to create a textured decorative surface,
- Kreisel - A German company that has factories in 20 countries, incl. in Russia. Putties are represented by cement and gypsum compounds,
- "Prospectors" - putties of domestic production. The quality is not bad, prices are affordable. The range is represented by gypsum, cement, polymer-cement and polymer compositions, which are suitable for starting and finishing work in dry and wet rooms, as well as for outdoor work,
- Volma - Another domestic manufacturer that has established itself well. The range of compositions is very wide. There are gypsum and polymer putties with different particle sizes. There are solutions for any situation.
You can also advise the products of "Ural building mixtures", "Armstrong" and "Euro gypsum".
When buying, do not forget to inspect the integrity of the packaging, pay attention to the expiration date and, if desired, ask for certificates of conformity - they must be from any responsible manufacturer and seller.
Varieties of putty for a wooden floor

To know what to choose putty for parquet, you need to understand the assortment of materials. The mixtures for the purpose are distinguished:
- starting (basic) - shown for the primary incorporation of large irregularities,
- Finishing is an option to finish the coating smoothly,
- universal - a material that combines both of the previous properties.
The composition of the putty is divided into the following groups:
- Based on gypsum. It has good adhesion to the surface, low price and versatility. It is popular and can be used as a base and / or finish.
- Oil putty for parquet cracks is ideal for different types of wood. Minus - long drying time due to oil in the composition of the material.
- Acrylic Well suited for sealing small defects: cracks, chips and grouting. The water-based composition is environmentally friendly, the material is flexible and resistant to mechanical damage. Less: weak adhesion properties (may move away from the edges of the gap after drying). Over time, this putty simply falls out of the seam if the gap increases in size.
- An alkyd composition is prepared on the basis of soybean, linseed and other oils. Pluses - high viscosity, elasticity, it is well ground. Minus - has a pungent smell.
- Latex or polymer hard putty for parquet is considered to be a finishing composition and is used for coating, to which high demands are made. The polymer composition hides bumps up to 2-3 mm, prevents cracking when drying thick layers of varnish, impeccably adheres to a smooth surface and is not exposed to moisture, steam. The price of such putty is higher than that of gypsum, but the advantages of the material are immeasurably greater.
- Dispersed mixture is a composition for the manufacture of putty at home. Here you don’t have to pick up a tone and buy a dye, just add the dust remaining after grinding to the mixture so that the surface has a perfectly even tone. It is shown for sealing roughnesses with a depth / width of up to 6 mm, it is distinguished by its affordable price and ease of operation.
You can also divide the compounds by type of base:
- The main aqueous component is putty, which dries quickly and does not release toxic compounds when heated. It is not recommended for hard wood: oak, cedar, chestnut.
- The main component is the solvent. These are universal sealing options suitable for any type of wood, varnish. Solvent putties are considered much more durable than water-based fillers, they adhere better to the surface, but are flammable and have a pungent odor.
Performance of work
Puttying the floor with your own hands is an occupation that requires certain skills. Using puttying, you can qualitatively update the existing flooring made of wooden boards during cosmetic repairs. Even repeated application of the paint composition to the surface requires preliminary puttying, which will help to make the floor even and smooth.
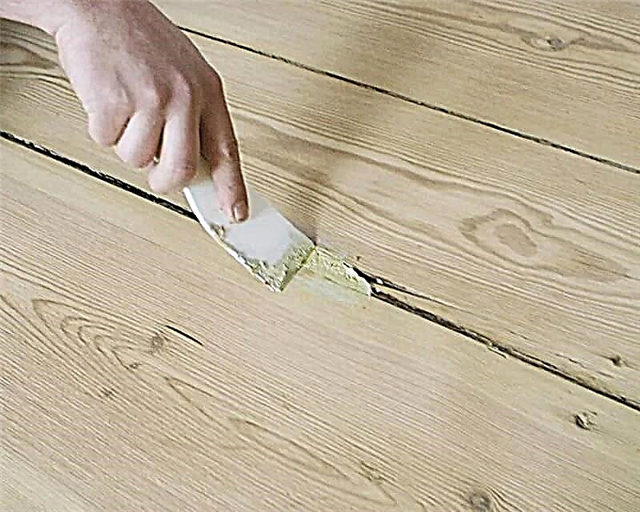
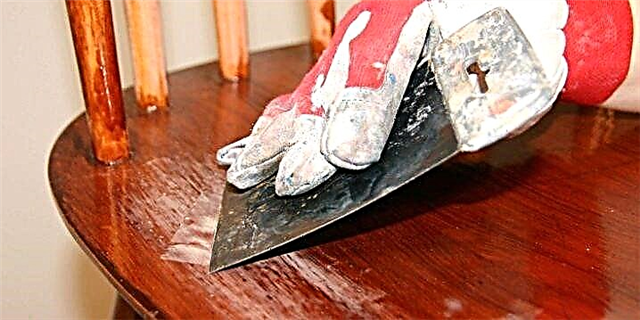
Putty is applied in a thin layer using a special steel spatula.
It is important that during the work the mixture fills all the existing cracks and cracks
You should pay attention to the thickness of the putty, because after complete drying the floors will have to be sanded. The number of layers of the applied composition depends on the degree of damage to the coating
Each subsequent (after it completely dries) is again polished. This continues until there are no bumps and depressions on the floor surface.
The use of wood putty is not always suitable for existing flooring. Therefore, after all the cracks between the boards are filled, plywood sheets are laid on top of the old coating, and linoleum is laid on them or a laminate is laid.
Putty on wood for the floor: how to cook yourself
If you still have a persistent desire, you can make putty with your own hands. The main will be drying oil.
 To give durability to putty, it is recommended to add a plasticizer to the mixture
Also, the composition of a home-made putty will include:
- Animal glue - 100 g
- Lacquer kerosene / turpentine - 130 g,
- Liquid Desiccant - 30 g.
The mixture will also include chalk and liquid soap. The chalk must be dry and sieved.
This putty is prepared like this:
- Heat the animal glue and add soap to it, keep this mixture on fire, stirring constantly.
- Introduce slowly into the mixture of drying oil, drier and turpentine. Chalk is added by the most recent.
- Mix very well until thick sour cream.
 The prepared solution can be used for several hours.
A very important point - this mixture should not cool, so you can put it on a steam bath. Or put the container with the mixture in a bowl of hot water.
How to choose?
The wooden surface after processing should be perfect - if thin grooves or dried-up grains of the mixture hide the wallpaper on the wall, then they will not tolerate varnish or painting hack-work
For those who are looking for how to putty the wood, it is important to remember the strict criteria for the putty:
- good adhesion (adhesion to the surface - both wood and varnish or paint),
- elasticity (for quick and easy application),
- minimum drying time (so as not to delay the repair),
- if you buy a dry composition - small particles, so that the final coating layer turns out smooth and thin,
- harmlessness to your health.
General recommendations for puttying a wooden floor
It is worth saying that the putty of the floor is made not only when laying a new floor covering, but also if you wish to refresh a little the existing one. The puttyed wooden floor can last for a very long time without replacement, preserving and even improving its qualities.
When laying the finish layer on a wooden base, it is recommended that the latter be puttied to provide the most even and smooth base for the final installation.
The main working tool is a spatula, with which small doses of the filler coating are evenly distributed on the floor surface. Spatula corners allow for puttying even in the most inconvenient and inaccessible places. It is the name of this tool that gave the name to the work process and the materials used.
 Color spectrum
Such an inexpensive and easy to use material as putty is able to give life to the old flooring or to protect the new from negative influences. Even an inexperienced repairman will cope with the process itself, and to save money, you can prepare putty on your own at home.
Making putty yourself

Making a mixture for wall decoration
You can prepare the material for puttying wooden surfaces with your own hands. There are various ways to do this.
1. The composition of this solution includes:
- turpentine oil - 60 gr.,
- linseed oil - 280 gr.,
- ground pumice - 30 gr.,
- casein - 20 gr.,
- edible gelatin - 20 gr.,
- borax - 12 gr.,
- ammonia 18% - 18 gr.
First of all, you need to mix oils with pumice. Then add 300 gr. water and all remaining components. Heat the mass in a water bath, stirring constantly until smooth. Once the mixture has thickened, remove from heat and cool, but not completely. It must be used in a warm form for 1 hour, otherwise it will lose its properties.
2. Another method involves the following composition:
- drying oil - 500 gr.,
- animal glue 10% - 100 gr.,
- turpentine - 125 gr.,
- liquid drier - 25 gr.,
- dry chalk
- liquid soap.
Animal glue needs to be heated. Then stirring to add liquid soap to it. Further, with stirring, drying oil, turpentine, desiccant are added in turn. Chalk is introduced in such an amount that the solution has the consistency of sour cream. In this case, the mixture is applied to the surface to be treated hot.
3. Putty can be made using chalk and PVA glue.
In this case, dry chalk is introduced into the PVA glue, the mass is thoroughly mixed. The amount of chalk is determined by the pasty state of the mixture. This putty can be used as a top coat for interior work.
4. Instead of PVA glue, it is permissible to use water-soluble varnish. The manufacturing procedure is similar to the previous method.
Putty for wood surfaces should be used immediately after preparation. Even with very short storage, it will lose its properties or dry up.
5. Putty with nitrolac. In this case, chalk and sawdust are diluted with nitro-varnish.
Basic rules for leveling walls
Main varieties
If you have already firmly decided that your windows, floor or doors need a protective filler, a legitimate question arises - how to putty wood? To work with such natural surfaces, several types of mixtures are suitable at once:
- classic plaster
- acrylic
- polymer
- solvent based (nitrous putty),
- oil and glue.
Gypsum mixtures are most often bought for wooden work: it is a very flexible putty, it is easy to bond and holds tight. One “but” - it can be used only in dry rooms: gypsum allows moisture to pass through.
Acrylic compositions are slightly more expensive, but they also have a larger list of advantages: they are ideal for grouting cracks in parquet, they are produced in various natural shades, resistant to water and fire, they dry in 4-6 hours, and most importantly, acrylic putty on wood is universal: Suitable for laminate, chipboard, and other materials. But there are also disadvantages: such a coating must be regularly updated, and large gaps must be closed additionally, one cannot do with one acrylic.

Putty can be used to seal joints between boards
Polymer (latex) putty mixture is also not cheap, but it dries quickly, lies flat and is environmentally safe. Ideal for working with parquet.
Nitro putty contains organic solvents, petroleum resins, various plasticizers. Such mixtures are resistant to water and chemicals, do not shrink and are easy to grind after drying, do not have a specific smell.
Oil compositions are prepared on the basis of drying oil, varnish, chalk, etc. They are very durable, can be used in rooms with humid air and outdoors. True, such putties dry a little longer than the rest.
Glue mixtures are kneaded immediately before the start of puttying.
Putting homemade putty
Apply putty made by yourself in the following order:
- Surface preparation. The coating is leveled, old decor elements, all kinds of roughness, bulges, rotten material, protruding fasteners, etc. are removed.
- Putty composition must be prepared in advance. If one of its components is sawdust, you need to wait a few hours until they swell. Putty is used immediately after manufacture. The entire composition must be developed in 1-2 hours, otherwise it will dry out and become unusable.
- The solution is applied with a spatula, brush or roller. Then wait for the complete drying of the surface. Depending on the components of the putty, this one will take 3-12 hours.


- The surface is sanded (sanded) using abrasive material.
- If necessary, protective compounds are applied to the material (against rust, fungus, moisture, fire, etc.).
- Apply paint, decorative plaster, varnish, etc. to the surface.
- The remaining mixture is disposed of.
In most cases, it is easier to purchase ready-made putty in the store. However, sometimes, as is the case with wood putties, the quality of the compositions leaves much to be desired. In this case, the output will be material of its own production.
Little tricks
If the gap or crack is very large, it must be repaired with a mixture of sawdust. We use homemade putty on wood. We prepare a mixture of chalk, PVA glue and small sawdust. We apply, dry and apply a serpentine (a self-adhesive nylon mesh sold in small bays 6-8 cm wide), apply the mixture with a layer of 2 mm. After drying - again with a thin layer.
 If the gap is too large, close it with sawdust
In order for the color filling on the wood to differ as little as possible from the color of the surface, add color (a liquid coloring element, the amount of which the color saturation of your mixture will depend on).
 If the mixture does not match the color, you can add color to it.
Slices of knots often rot in old wooden doors and window frames. It is better to drill them, pour glue for wood or PVA. Insert the cut wooden chopstick and putty in a thin layer. Grind.
Wooden surfaces on the street are first treated with an antiseptic, impregnated with drying oil. Putty on the prepared surface. After drying, grind. To cover we take varnish or paint.
Which one to choose?
When buying any finishing material, the consumer first of all expects to become the owner of a high-quality product. High-quality wood-based putty material must meet certain criteria.
- the mixture should be homogeneous
- putty should be easy to sand,
- high adhesion
- the composition must not contain impurities,
- short drying time
- ease of application
- the dry mixture should consist of fine particles so that the finished putty is laid with a thin and strong layer,
- environmental friendliness.

High quality putty is not the only selection criterion.
To choose the right mixture, it is important to pay attention to the following factors:
Place of work: for exterior or interior decoration.
The color of the mixture. Manufacturers produce putty of a wide variety of shades of natural wood: pine, wenge, beech, oak, cherry, etc. Having picked up a mixture of a suitable color, the treated surface can not be painted and immediately varnished. White putty is used for tinting or for leveling the surface.
Purpose of work: basic or finish.
Purpose of work
In this case, it is important what result you want to get: surface treatment for painting for better adhesion, masking of defects, repairing cracks and leveling, restoration, improvement of qualities and certain characteristics of wood.


Surface preparation
The first step is to prepare the surface. Many inexperienced "masters" do not pay due attention to preparing the surface for putty, believing that putty will close all the bumps. Before applying putty, it is necessary to prepare the surface. Namely, remove old paint, dust, dirt, nails and other metal objects.

Where metal objects were located, it is advisable to cover the holes with enamel. This is necessary so that rust does not come out through the putty, when applied. After that, brush the surface to remove small, stuck particles of debris, and then wipe it with a slightly moistened sponge.

Surface priming
The next step, as in the case with puttying the walls, is the application of a primer. Primer, obligatory work before puttying. A primer is necessary for better adhesion of the putty to the surface, as well as for additional protection of the wooden surface from rot and mold. Choose a primer with a similar composition of putty. If you have an oil putty, then take a primer based on drying oil. For nitro putty, take the same composition of the primer.

Puttying the surface
After drying and polymerization of the primer (from 4 hours or more, depending on the composition and manufacturer), first you need to putty cracks and other irregularities.

The first layer of putty should be no more than 2 mm thick. We are waiting for the mixture to dry. We correct, align with sandpaper. We put the next layer of putty, leveling the surface as much as possible. The second layer should be no more than 1.5 mm thick. After the second layer has dried, we clean the surface with sandpaper.

Puttying wooden surfaces, the process is quite troublesome, but it's worth it to "breathe" new life into an old object. Follow the instructions of the manufacturer of the material you have chosen and there will be no problems with the execution of the work.
Inspirations
and easy repair for you!)
Application Recommendations
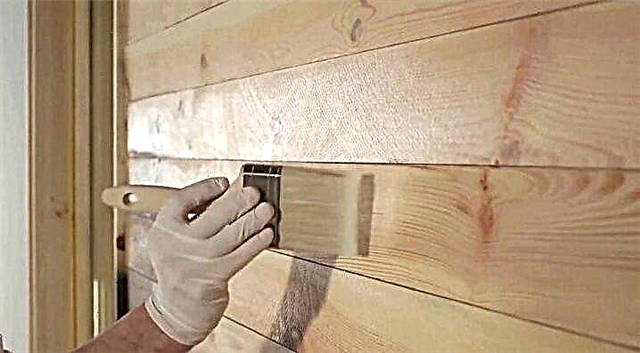
As with all other types of finishing work, a number of preparatory measures are necessary before puttying the wooden coating. First of all, it is necessary to prevent the likelihood of pollution from the putty mixture in the room in which the finish will take place. If you want to putty the walls, then the window frames, door, furniture, floor surface must be covered with plastic wrap.
It is also necessary to take care of your own safety. Some putty mixtures have a pungent, unpleasant odor.

Next, you need to prepare the necessary tools.
For finishing work you may need:
- wide and narrow iron spatula,
- a bucket or any other container for the mixture,
- paint brush, roller or construction gun (suitable for applying liquid mixtures),
- sandpaper,
- building scraper,
- steel wire brush
- trowel for plastering,
- sponge.


Before you begin to putty on wood, the surface must be prepared for decoration. If there is already a layer of paint or plaster on the tree, it is advisable to clean it, otherwise the putty may peel off from such a surface. To remove the old coating, you can use a building hair dryer, solvents or a wire brush.
When working with solvent, the following rules must be followed:
- the product should be applied evenly over the entire surface,
- after application, you must wait fifteen minutes,
- swollen paint must be removed with a spatula,
- if the procedure is carried out indoors, the room must be well ventilated.
To improve the adhesion of materials, wood must be primed. In addition, most primers contain antiseptic components. Wood treated with this composition will be protected from fungus, mold and moisture. It is desirable that the composition of the primer be similar to that of the putty material.
Three layers of primer should be applied to the surface, and then allowed to dry well. The exact drying time of the mixture can be seen on the packaging of the primer. After the wood has completely dried, you can start the putty process.
Before applying putty, it is necessary to carefully inspect the surface for cracks. In case of defects, it is necessary to seal the cracks with putty. It is better to cover the most problematic areas with large defects with a self-adhesive tape with a syrup, which will reduce the consumption of putty during finishing and prevent cracking.

After removing defects on the surface, you can proceed to the main finish.
When applying putty on the surface, you should adhere to the following algorithm:
- Using a narrow iron spatula, putty is spread on a wide tool.
- The mixture is applied to the surface by diagonal movements from top to bottom.
- The thickness of the first layer should not exceed three millimeters.
- After applying the first layer on the surface will remain stripes. When the putty dries, the defects are removed with sandpaper.
- The thickness of the last layer should not be more than one and a half millimeters.
- At a favorable temperature, the putty dries for about a day. It is worth considering that this is the maximum drying time.


In order for the result of the work done to live up to expectations, some rules must be observed.
The main recommendations for applying putty:
When carrying out finishing work, it is important that the air temperature is not lower than five degrees Celsius. Otherwise, the mixture thickens, which makes it difficult to penetrate the cracks.
Before the main processing, all indentations in the surface must be sealed.
It is advisable to use a stainless steel spatula .. How to seal the gaps in the furniture with putty, see below
How to close up cracks in furniture with putty, see below.
Preparation for application
Foreign objects and debris must be removed from the surface. Then it is cleaned from old paint, plaster with a solvent and sandpaper. The protruding parts of the fasteners (nails, staples) are coated with enamel so that they do not rust. Fine dust is first collected with a brush and then with a damp sponge.

When doing putty with your own hands, do not neglect the primer. When choosing a primer, it is recommended to give preference to compositions that are suitable for puttying. Under an oil mixture, it is better to use a primer on a drying oil, and a nitro primer is used under a mixture with a solvent.
Hard putty of a wooden floor: the nuances of technology
There are some subtleties of the work that do not represent anything complicated, and, nevertheless, they must be taken into account in the work.
 Do not work with putty at sub-zero temperatures: then the mixture loses its elasticity
When puttying wood:
- Work only with a dry board, humidity should not exceed 12%,
- Be sure to clean the surface - remove grease, dust, dirt,
- Then carefully putty with a spatula,
- The composition should rise above the surface of the tree, as during drying it will give some shrinkage,
- Then the puttyed area should be sanded, it is better to do it, of course, with a grinding machine or, in extreme cases, fixed with an emery cloth,
- After processing, the hillocks will leave, but the shells will be visible - they need to be puttied.
After drying, the grinding step proceeds again, and this work is done until the surface is even.
How to make putty yourself
In the hardware store you can buy any putty, but when there is no way to purchase it, you can independently make a mixture for the restoration of the wooden floor.
The basis of putty is drying oil. For 500 g of drying oil, it is necessary to prepare the following components:
- animal glue (10%) - 100 g,
- turpentine or kerosene based on varnish - 125 g,
- liquid drier - 25 g.
Also, for the preparation of putty, you need dry sifted chalk - 0.5 kg and liquid soap 100 g.
The technology for preparing the putty mixture should be strictly observed:
- First you need to heat animal fat over the fire, constantly stirring to introduce liquid soap into the mixture.
- The components are introduced into the mixture in small portions in the following sequence: drying oil, turpentine and desiccant. The mixture is mixed.
- The hot mixture can be removed from the heat, add chalk and mix. The consistency of putty should resemble store sour cream.
Using self-prepared putty, it must be remembered that the mixture should always remain warm. If you need to fill a few cracks and smooth out irregularities, then do not prepare a large amount of putty. During operation, even if there is a large area to be processed, the material must be kept warm, so prepare a basin or bucket of hot water in advance and place a bucket of putty in it.
You can prepare a putty for the treatment of wooden floors using a minimum amount of materials. The budget recipe for cracking consists of a mixture of PVA glue and sifted chalk. Putty should consistency resemble thick sour cream. If it is necessary to eliminate significant defects of the wooden floor, then crushed dry wood sawdust is added to the mixture. This putty dries about 2 days.
Another simple recipe for puttying at home: take chalk or a cheap finishing plaster, dilute the dry mixture with water-soluble or acrylic varnish. Mix the mixture until pasty.

If it is necessary to process wooden floors in a damp room, then it is better to use an oil-based putty. It consists of 1 kg of drying oil, 100 desiccant brand NF-1 and 2 kg of chalk.
Putty from construction waste: take clean oil-based linoleum (without insulation), break it into pieces and fill it with acetone. Wait until the putty gets the right consistency.
Types of putty for interior use
There are many types of putties for indoor decoration. Their choice entirely depends on the type of surface being treated, as well as on the financial capabilities of everyone who decided to engage in finishing work. For example, the price category of epoxy and polymeric materials can vary significantly.
Acrylic
Such material is produced exclusively through the use of chemical constituents. Acrylic putty on wood after complete drying forms a fairly strong, but elastic layer. It lends itself well to subsequent processing. It does not take excessive effort to polish it.

It is believed that this type of putty is the most environmentally friendly. That is, its effect on the human body is practically not observed. It can be used for finishing any type of surface. This can be very convenient, because you do not need to select your own composition for each material. Not to be used for sealing large joints and cracks. It is believed that the optimal layer thickness cannot be more than 2-3 mm.
Epoxy
This type of putty is used to seal and smooth out any imperfections that may be on wooden surfaces. This versatility can be achieved due to the fact that the epoxy putty perfectly enters the adhesion and does not require effort for application.
It has the following advantages:
- the epoxy dries quickly enough,
- does not require special tools to work,
- putty it can be any flaw,
- after complete drying is subjected to grinding,
- epoxy putty is resistant to moisture,
- practically does not interact with chemicals,
- full grip with all groups of materials.
To achieve the greatest effect, fillers are added to epoxy solutions. They give increased viscosity. How much to add such a substance to the composition is calculated only in place.
Oil-glue
This putty is used to correct numerous defects that form on window frames, ceilings, doors and frames. Not used for floor work. Possessing a wide palette of shades, it does not need additional color addition. The only significant drawback is the long drying time.
Types of putty for a wooden floor
It is necessary to putty the surface of the boards in case of various defects. But in the market of building materials it is presented in a wide range. Each mixture is different in composition, so manufacturers produce putty in various shades, the only way to accurately transmit the color of different types of wood.
From the article you can learn about such finishing material as putty on wood for the floor.
Putty on solvents
This composition is made on the basis of a solvent and was actively involved in the woodworking industry. Moreover, professional builders and amateurs used this tool. This version of putty was a pioneer, because only during its application, developers were able to come up with all other types of putty mixtures.
Fillers on solvents are characterized by high strength indicators, but in their composition can be very dangerous and have an unpleasant odor.
From the article you can find out how to use putty for wallpaper.
Water Based Putty
Such a product does not pose any danger to human and animal life. It is very simple to use, they have an aesthetic appearance and do not have a smell. To remove excess, simply wipe the surface with turpentine or acetone.
After reading the article, you can find out how thick it will be necessary to lay plywood on a wooden floor, which is a preparation before plastering the plank floor.
Compared with the previous version, the water putty dries very slowly in the jar, therefore, it has a long shelf life when the packaging has already been sealed. Due to its high adhesive properties, putty can be applied on a polished surface.
With any repair, it will be interesting to know how much finishing putty may be needed or how much it will take to knead immediately on a particular volume, which can be found out by reading the article.
The advantages of water putty include the following:
- qualitatively mask flaws,
- allowed to grout floor joints,
- does not emit harmful components, even at high temperatures,
- not affected by moisture
- long term of operation,
- not exposed to temperature extremes, as a result of which the putty protects the wood from fire,
- high elasticity due to which it is possible to simulate a different surface texture.
It will be interesting to learn from this article how plaster differs from putty.
All the properties presented can be achieved only after the water-based putty is completely dry.
Oil based
This version of the material is considered the most suitable for a wooden surface. Filling is perfect for processing facades before painting. Oil putty is characterized by strong water-repellent properties, and the composition also tolerates climate changes without crumbling or cracking. Thanks to a wide range of shades, it is possible to choose a composition by color and give the tree a natural texture without applying paint to it.
Polymer (acrylic)
This version of putty is often also called acrylic. Today it is very popular and is used for any construction and repair activities. The reason for this demand is excellent performance - long-term operation, ductility and lack of shrinkage. An alternative is Litochrom epoxy grout, but it is more often used for stone and tile.
From the article you can find out what is a finishing putty for painting and what its application is.
The composition contains polymers and plasticizers, due to which the polymer putty is actively used for cladding dry rooms and wet ones. Thanks to this material, it is possible to repel moisture and not be exposed to temperature changes. Due to the fact that the acrylic putty perfectly withstands loads, they began to use it to process a wooden floor.
The advantages of the material include:
- High rates of elasticity. Thanks to the mixture, even the smallest cracks and voids can be filled. Putty is used to clog the joints of the boards in the parquet.
- Not subject to shrinkage. Compared to other options, this material is sufficient to be applied only once, and it will ideally retain its shape after it has dried.
- Long term use. Given the operating conditions, such a coating can please you for 3-10 years.
- The cost of polymer putty may be slightly higher than other options, but the amount spent will pay off in the first years of use. Other compounds will form cracks on their surface, but acrylic will retain its original IVD for a long time.
- A wide selection of shades.
- Environmental friendliness.
- Reduces dust accumulation.
- It dries quickly.
From the article you can find out why facade putty is necessary for outdoor work.
On the video - putty for a wooden floor:
Manufacturers and prices
In the market of building materials, putty for a wooden floor is available in a wide range. This product is sold in various colors and composition, so that each owner will be able to choose their ideal option. Popular manufacturers include the following:
- Berger Aqua-Seal Pafuki - This putty is made in Germany and costs 1,200 rudders.
- Berger Aqua-Seal Spachten Gel - a material that dries very quickly is produced on the basis of soluble water, acrylic-polyurethane dispersion. This putty has no smell, is not exposed to fire. The cost of the product is 2800 rubles.
- Berger Pafuki-Super - solvent-based putty, used to eliminate cracks, holes and cracks. It costs 1020 rubles.
- Bona gel - dispersion helium composition, for the production of which a polyurethane dispersion was used. Cost 1,430 rubles.
- Bona mix & fill - water dispersible putty for the treatment of wooden floors. The cost of it is 560 rubles.
- Bona Mix & Fill Plus - This is a binder composition that is actively used to seal cracks in the wooden floor and the gaps between the parquet planks. The cost is 1200 rubles.
- Domallux Capon Szpachla - Polish putty, cost - 780 rubles.
- Loba Ws Easy Fill Plus - water-based putty, dries very quickly, acrylate acts as a binder component. It costs 1250 rubles.
- Loba Ws Topgel - aqueous gel based on polyurethane-acrylic. The cost is 550 rubles.
- Lobadur Fugenkitt Losung. This is a German manufacturer's tool that perfectly copes with defects in a wooden floor. It costs 970 rubles.
- Pallmann allkitt - one-component putty, based on alcohol. The cost is 850 rubles.
- Pallmann pall- x kitt - one-component putty, based on alcohol. Cost - 910 rubles.
- Tover Ilrostucco Rs 30 - water-based putty that mixes with wood dust. The product costs 680 rubles.
- Tover Lega Stuucco Rs20 - a solvent-based composition miscible with wood dust. It costs 270 rubles.
From this article you can find out how much the putty actually dries.
On the video - do-it-yourself putty of the wooden floor:
A wooden floor is always very stylish and beautiful, but to maintain the beauty of its appearance, it is necessary to eliminate the defects that have arisen in time.
From this article you can find out about the putty consumption per 1 m-2.
For these purposes, it is worth using putty, which very quickly and efficiently removes all flaws on the surface and at the same time is absolutely safe for people and animals around.